Sharing my journey of building this bright turtle shell.
Festival Totems
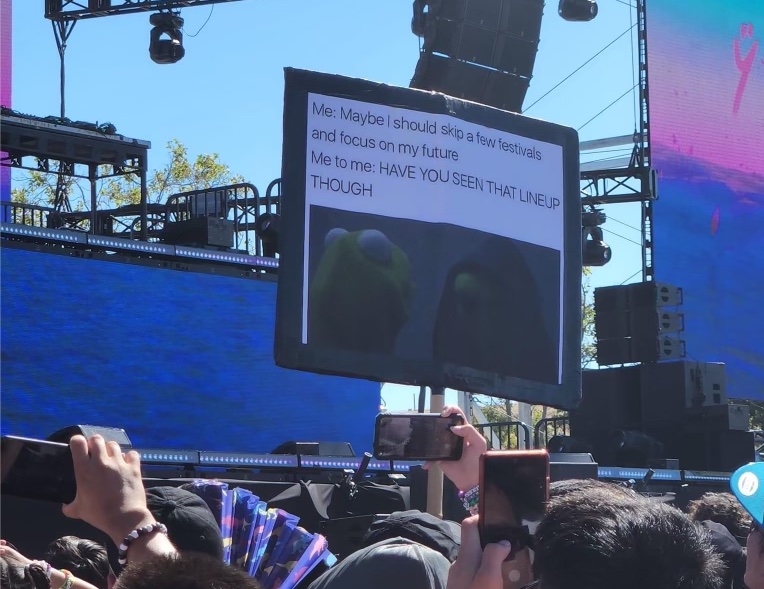
If you’ve ever been to a music festival, you may have seen groups with festival totems. They are usually signs put up on a stick with a clever meme. The purpose of which is to help find your group in the middle of a large crowd. Especially in live music situations, it’s sometimes very hard to find the group in a sea of people. Here’s an example of a great totem I saw:
Brainstorming!
Our group made a packing list for Beyond Wonderland at the Gorge (2021) and rave mom listed “totem” as an optional item. I figured, I’m artsy, why not figure out a totem :)
With the deadline in place, I had 3 weeks to build something.
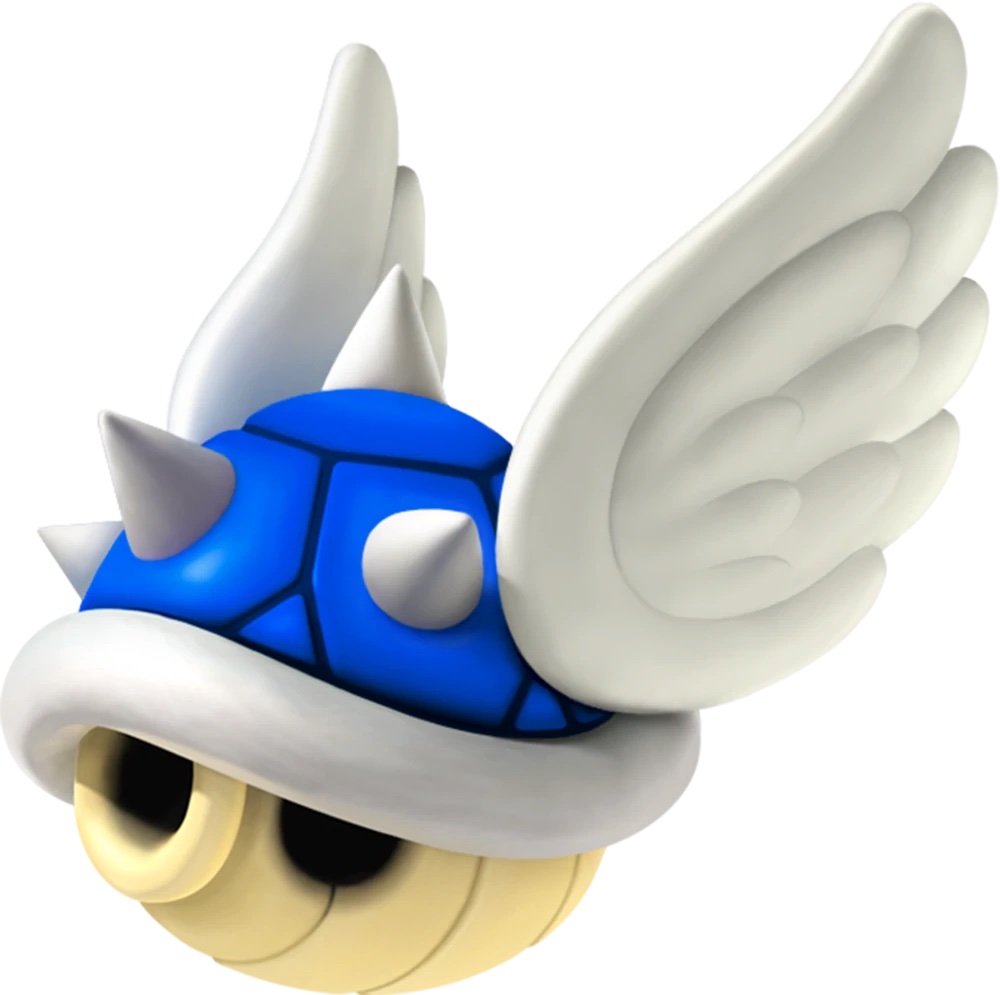
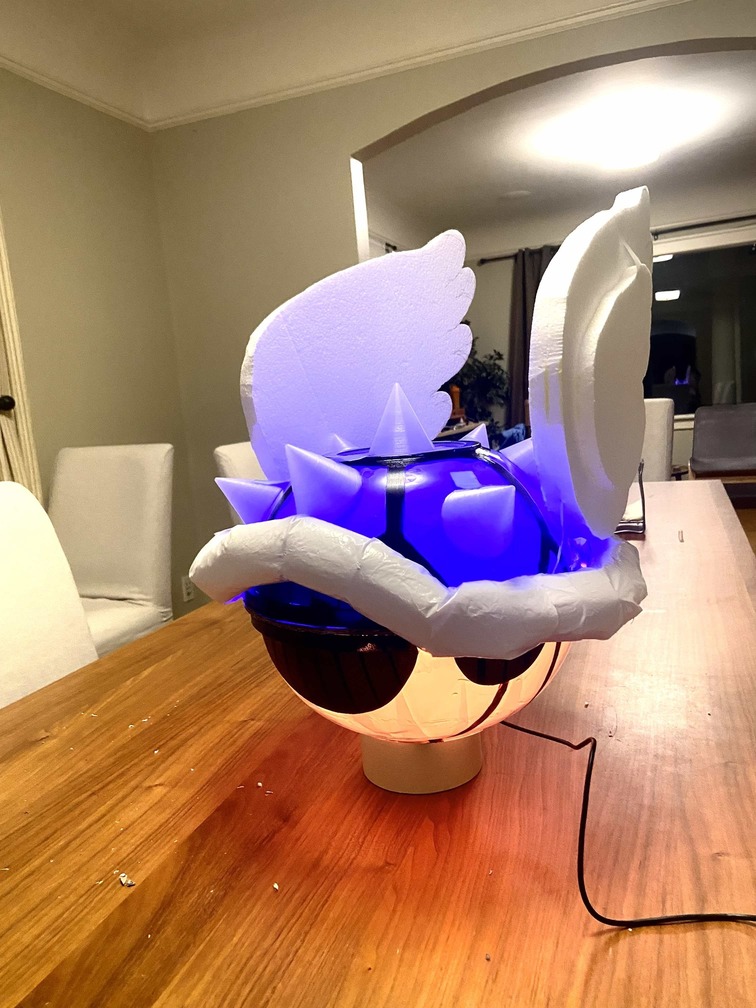
A lot of my rave family are graduates of the University of Maryland, so we gravitated to a turtle of some kind (GO TERPS). Few iterations in the chat and we settled on a 3D Mario blue shell!
Creating Mr. Blue
I decided it’d be too hard to 3d print a whole shell. It was also virtually impossible to find any sort of foam ball that large to work with. After scouring the internet for materials, I settled on 12” salad bowls! Got a 4 pack on Amazon, and figured a couple of extra bowls may be nice.
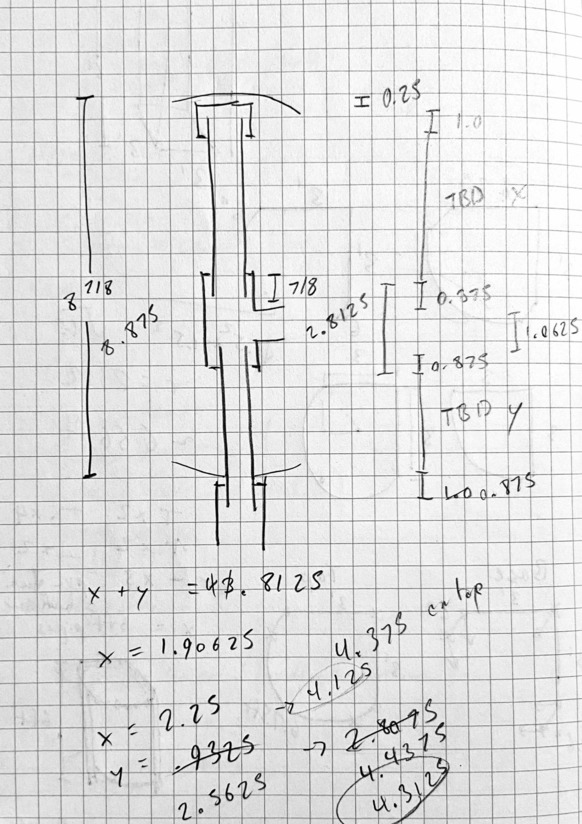
Once they arrived I got a whiteboard marker and did some planning to figure out how big this would be and where I’d put everything.
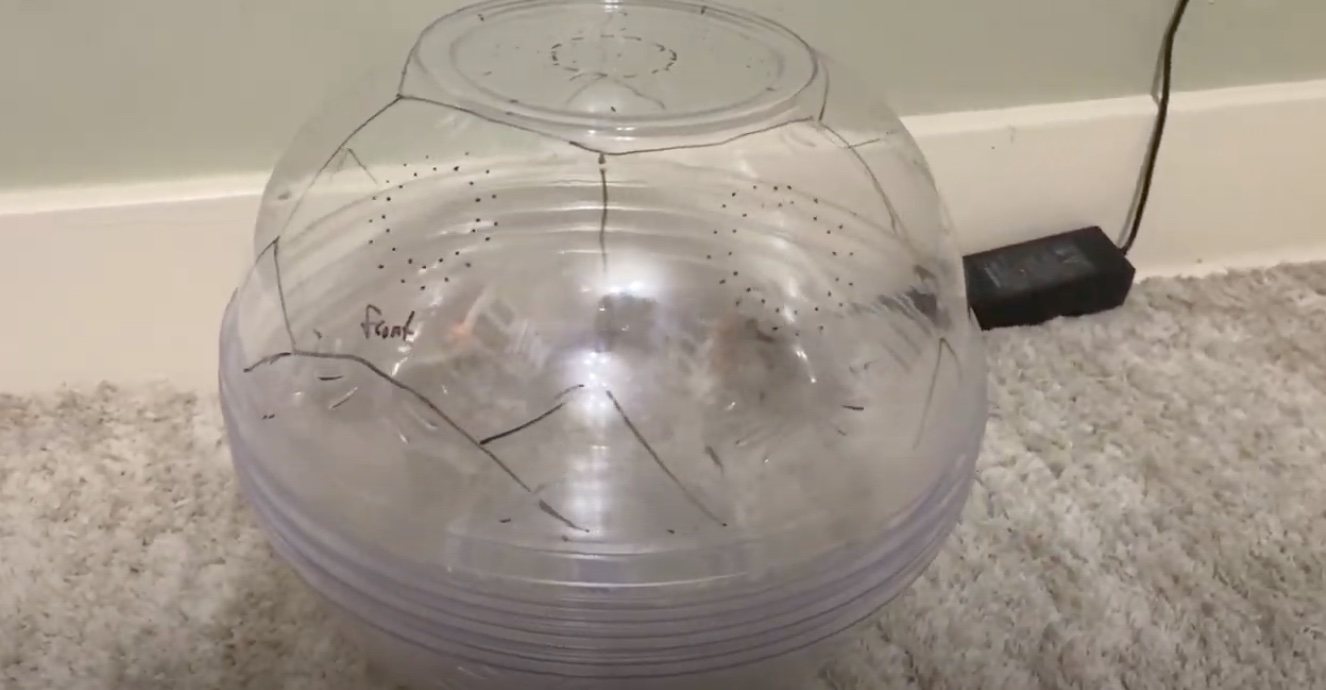
This picture is from me figuring out the top design and drawing little circles to decide how big I needed these spikes to be.
With that figured out, I made a quick CAD model for the spikes and sent that to the printer. (I was given glow-in-the-dark filament for my birthday so I put it to the test!)
I figured we’ll need to put some LEDs inside and to diffuse the light we should put some parchment paper. Then for the turtle hole in the front and back, we could use black masking tape to make it feel like a hole and some paint for the other details.
We also needed to put all this on some sort of pole, so I ran to the hardware store and got 0.5.” PVC pipe and a bunch of possible connectors. I planned to send power through the PVC pipe from a power bank into the bottom of the bowl. A T connector in the shell would allow for power to escape the pipe for LED strips. The pipe would also continue further up the shell where it would be screwed securely to hold the bowls in place. If we needed to take any of it apart, the pipes would be easily disconnected. Here’s my sketch of what the PVC connectors would look like:
It’s about five days till the festival and I set up my workshop to cut the PVC pipes to size, and drilled holes into the bottom of the bowl. (I broke a bowl trying to do it the first time, note to self: surround brittle materials between two layers of wood before attempting to drill directly into plastic that shatters)
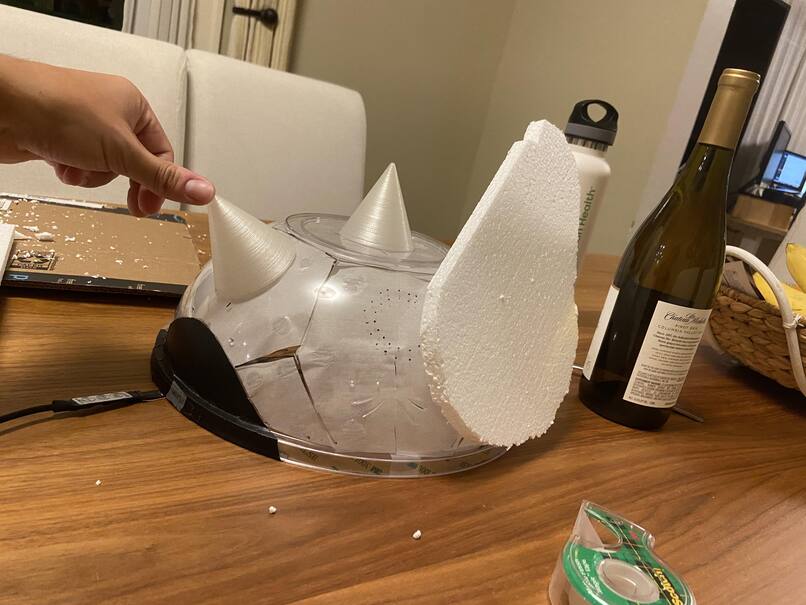
Two days until the festival and Kevin came over and had this brilliant idea to use an old clothes hanger and some styrofoam to make the wings. He also helped me with the base. I figured for the lip of the shell, I could make a moldable shape with some craft foam sheets, and to make it less obvious, I taped some white plastic shopping bags around it, creating what you see in this picture:
I got to work on the inside! We got two pieces of cardboard, sandwiched the coat hanger between them and taped down the LED strips on the cardboard. Unfortunately, the sticky side of both LED strips was too old so we used various tapes and it definitely felt homemade.
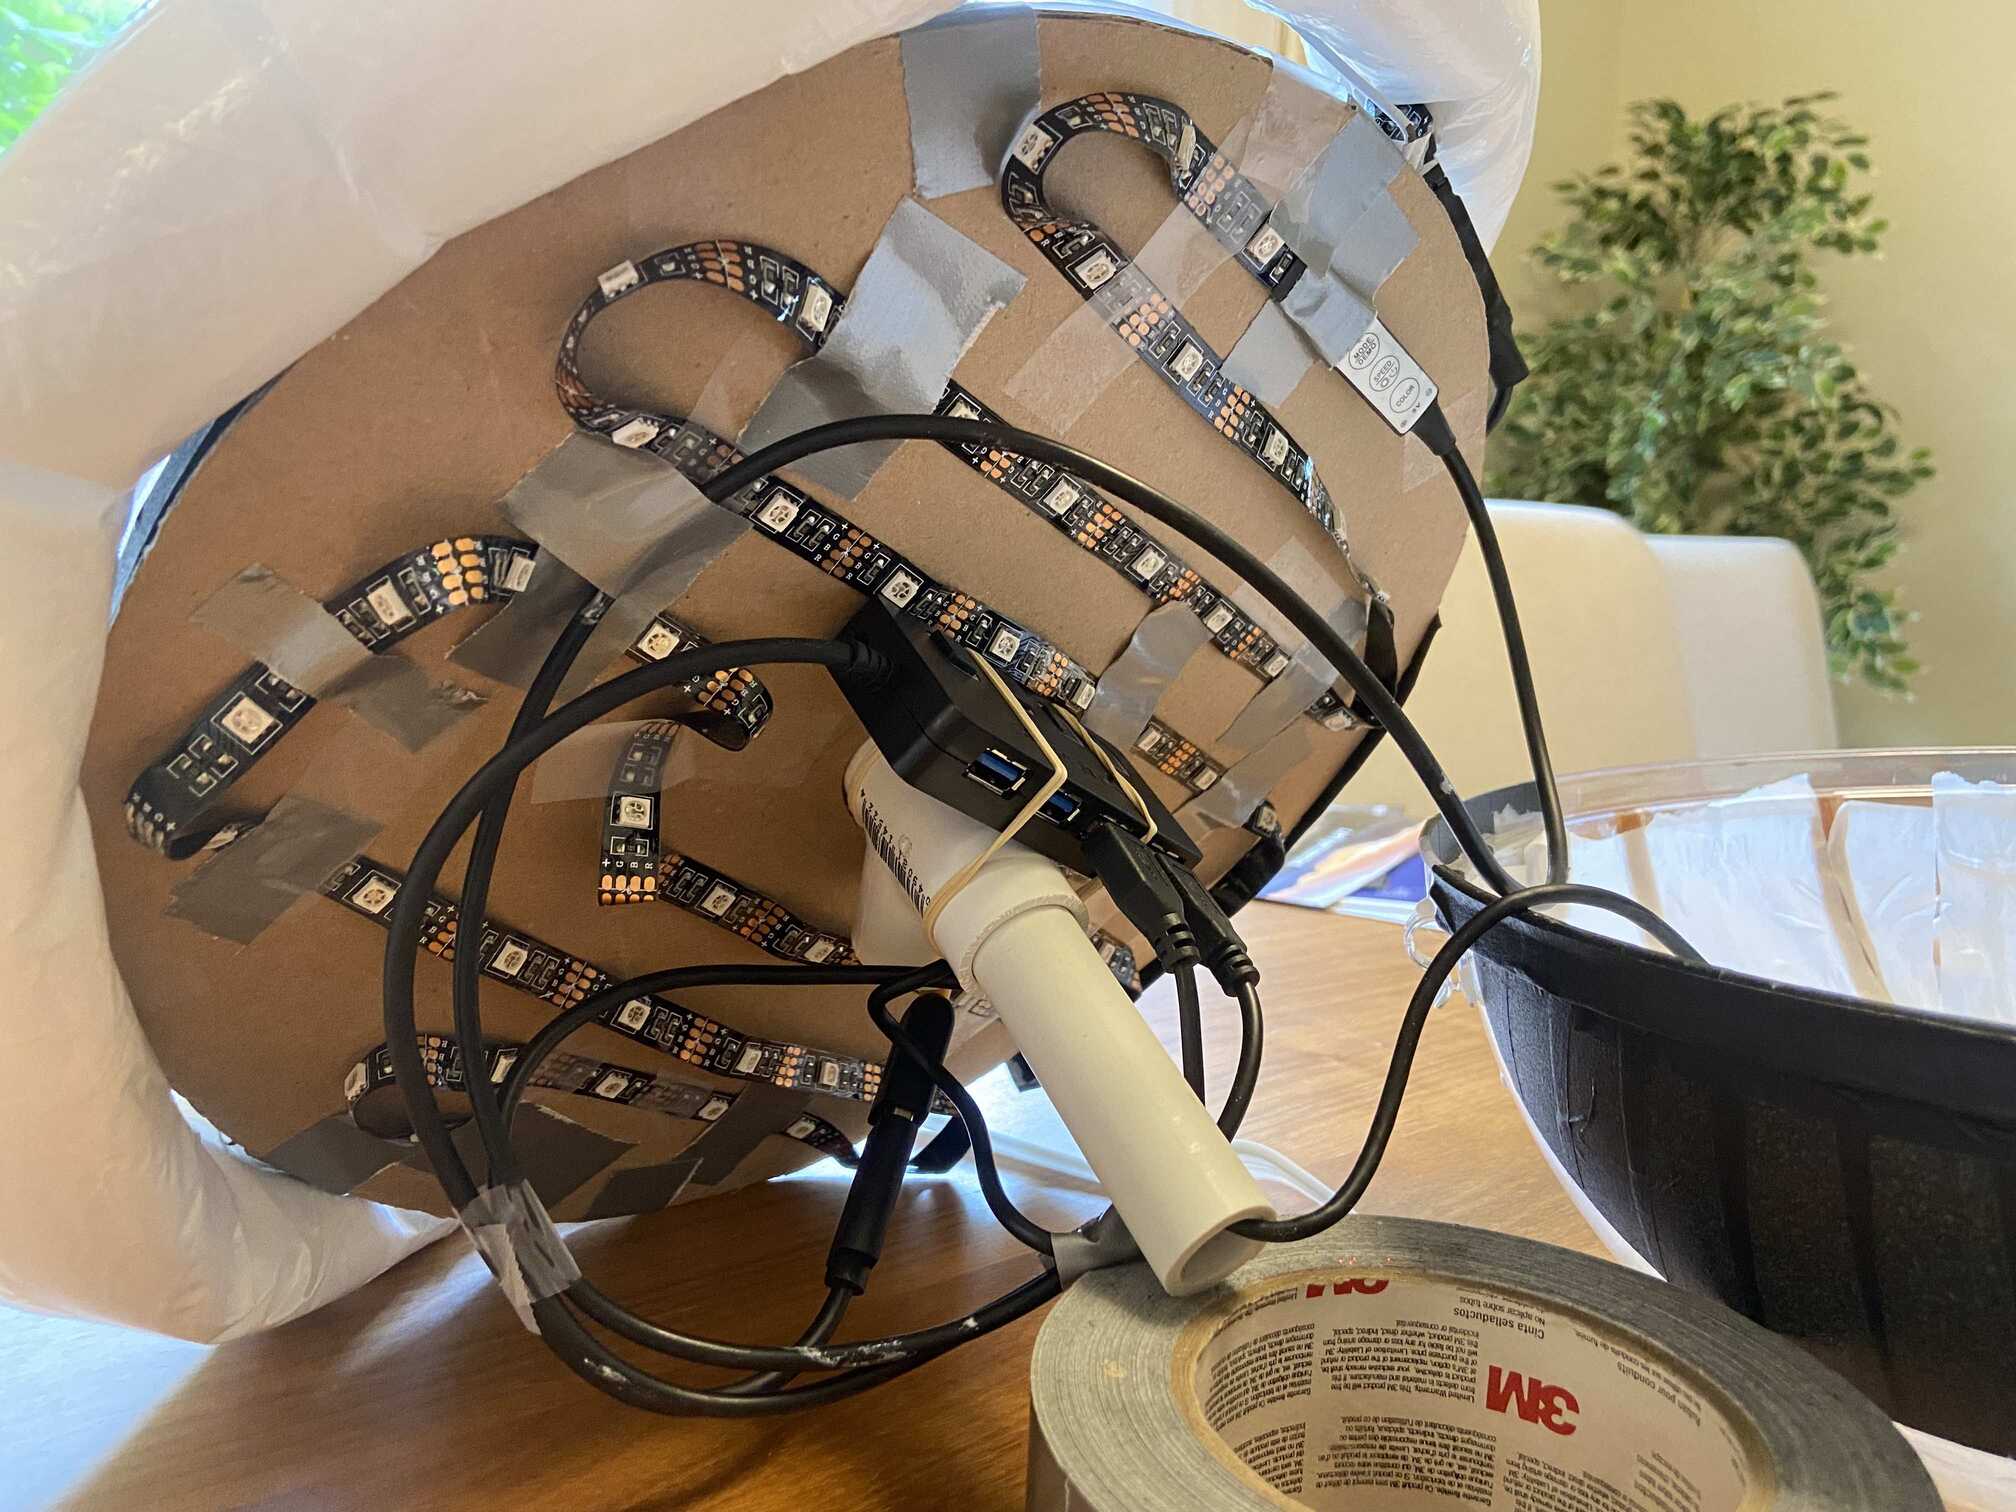
If you look closely, you can see a USB extension cable coming in through the bottom of the totem, into the PVC and then out the T junction where the USB is connected to a 4-way USB splitter, and out of the splitter are two LED strips plugged in. One is for the bottom half of the shell (yellow), and one is for the top half of the shell (blue!). I had a bright idea of exposing the top led strip’s control buttons on the side of the totem so we could change the lighting behavior of the top (red/green/blue shells) without opening up the whole thing.
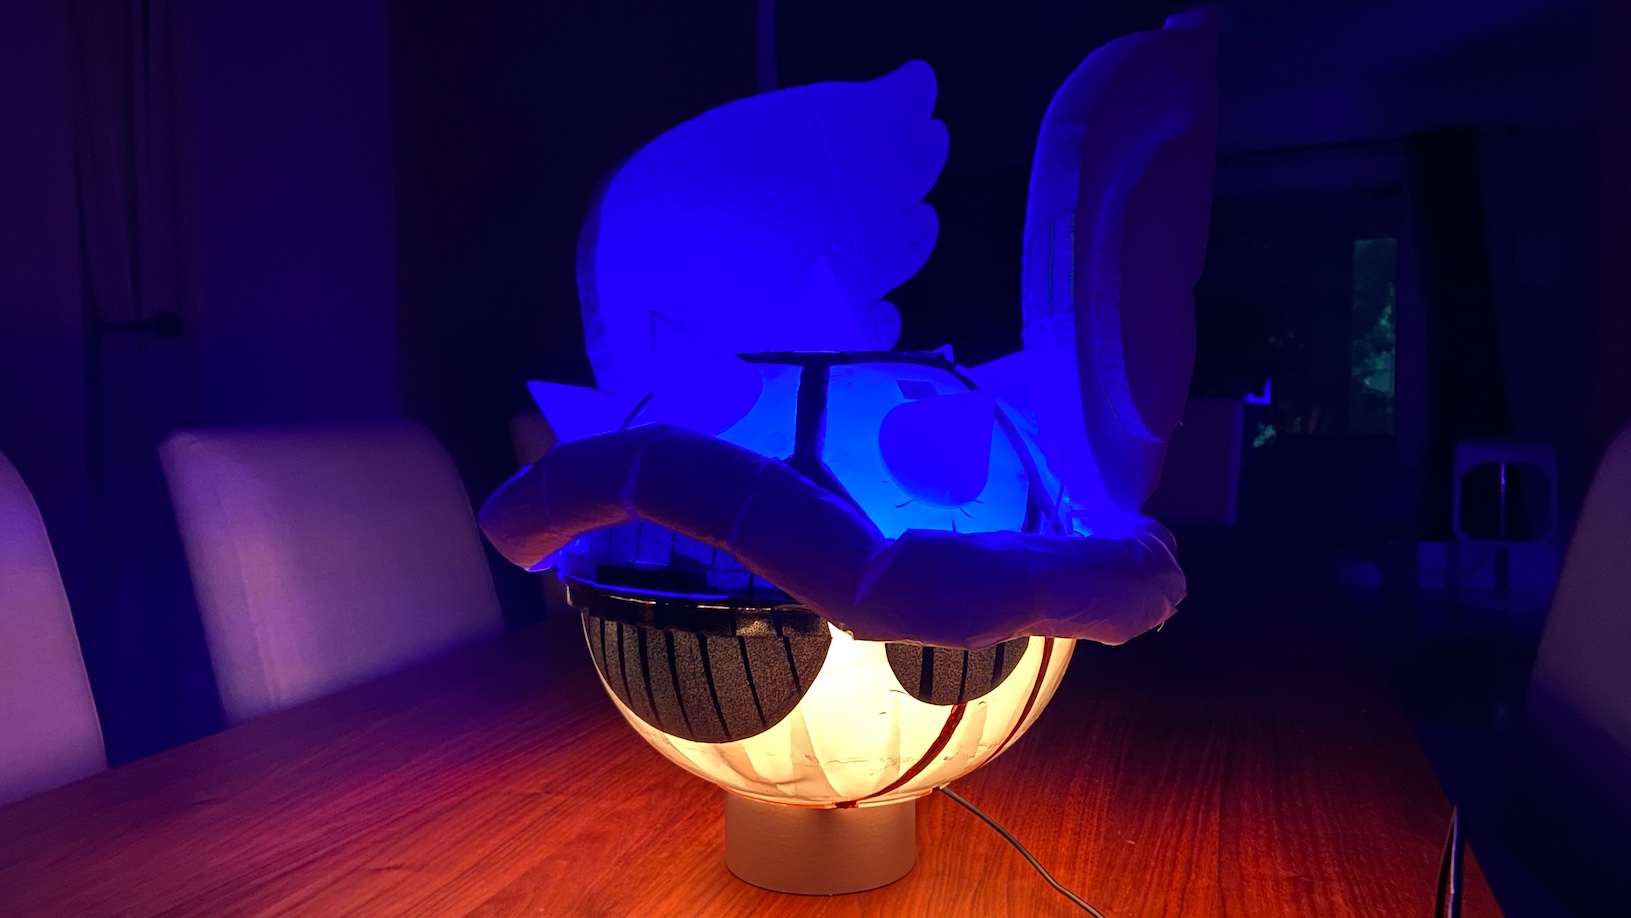
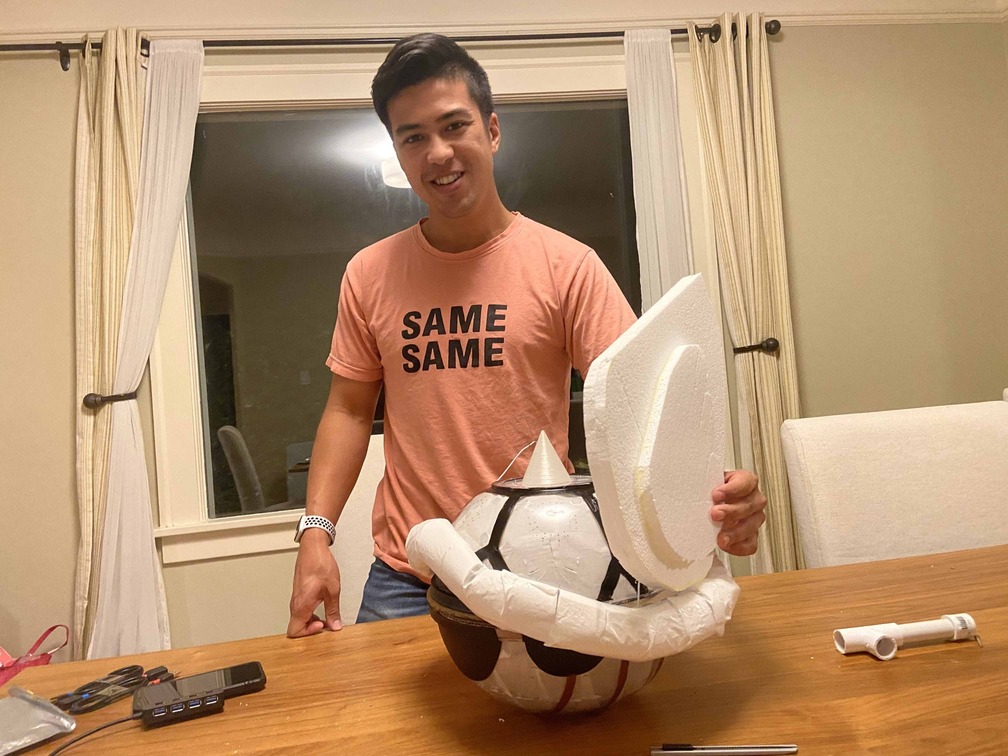
Before we knew it, we had successfully built the shell!
Final Touches
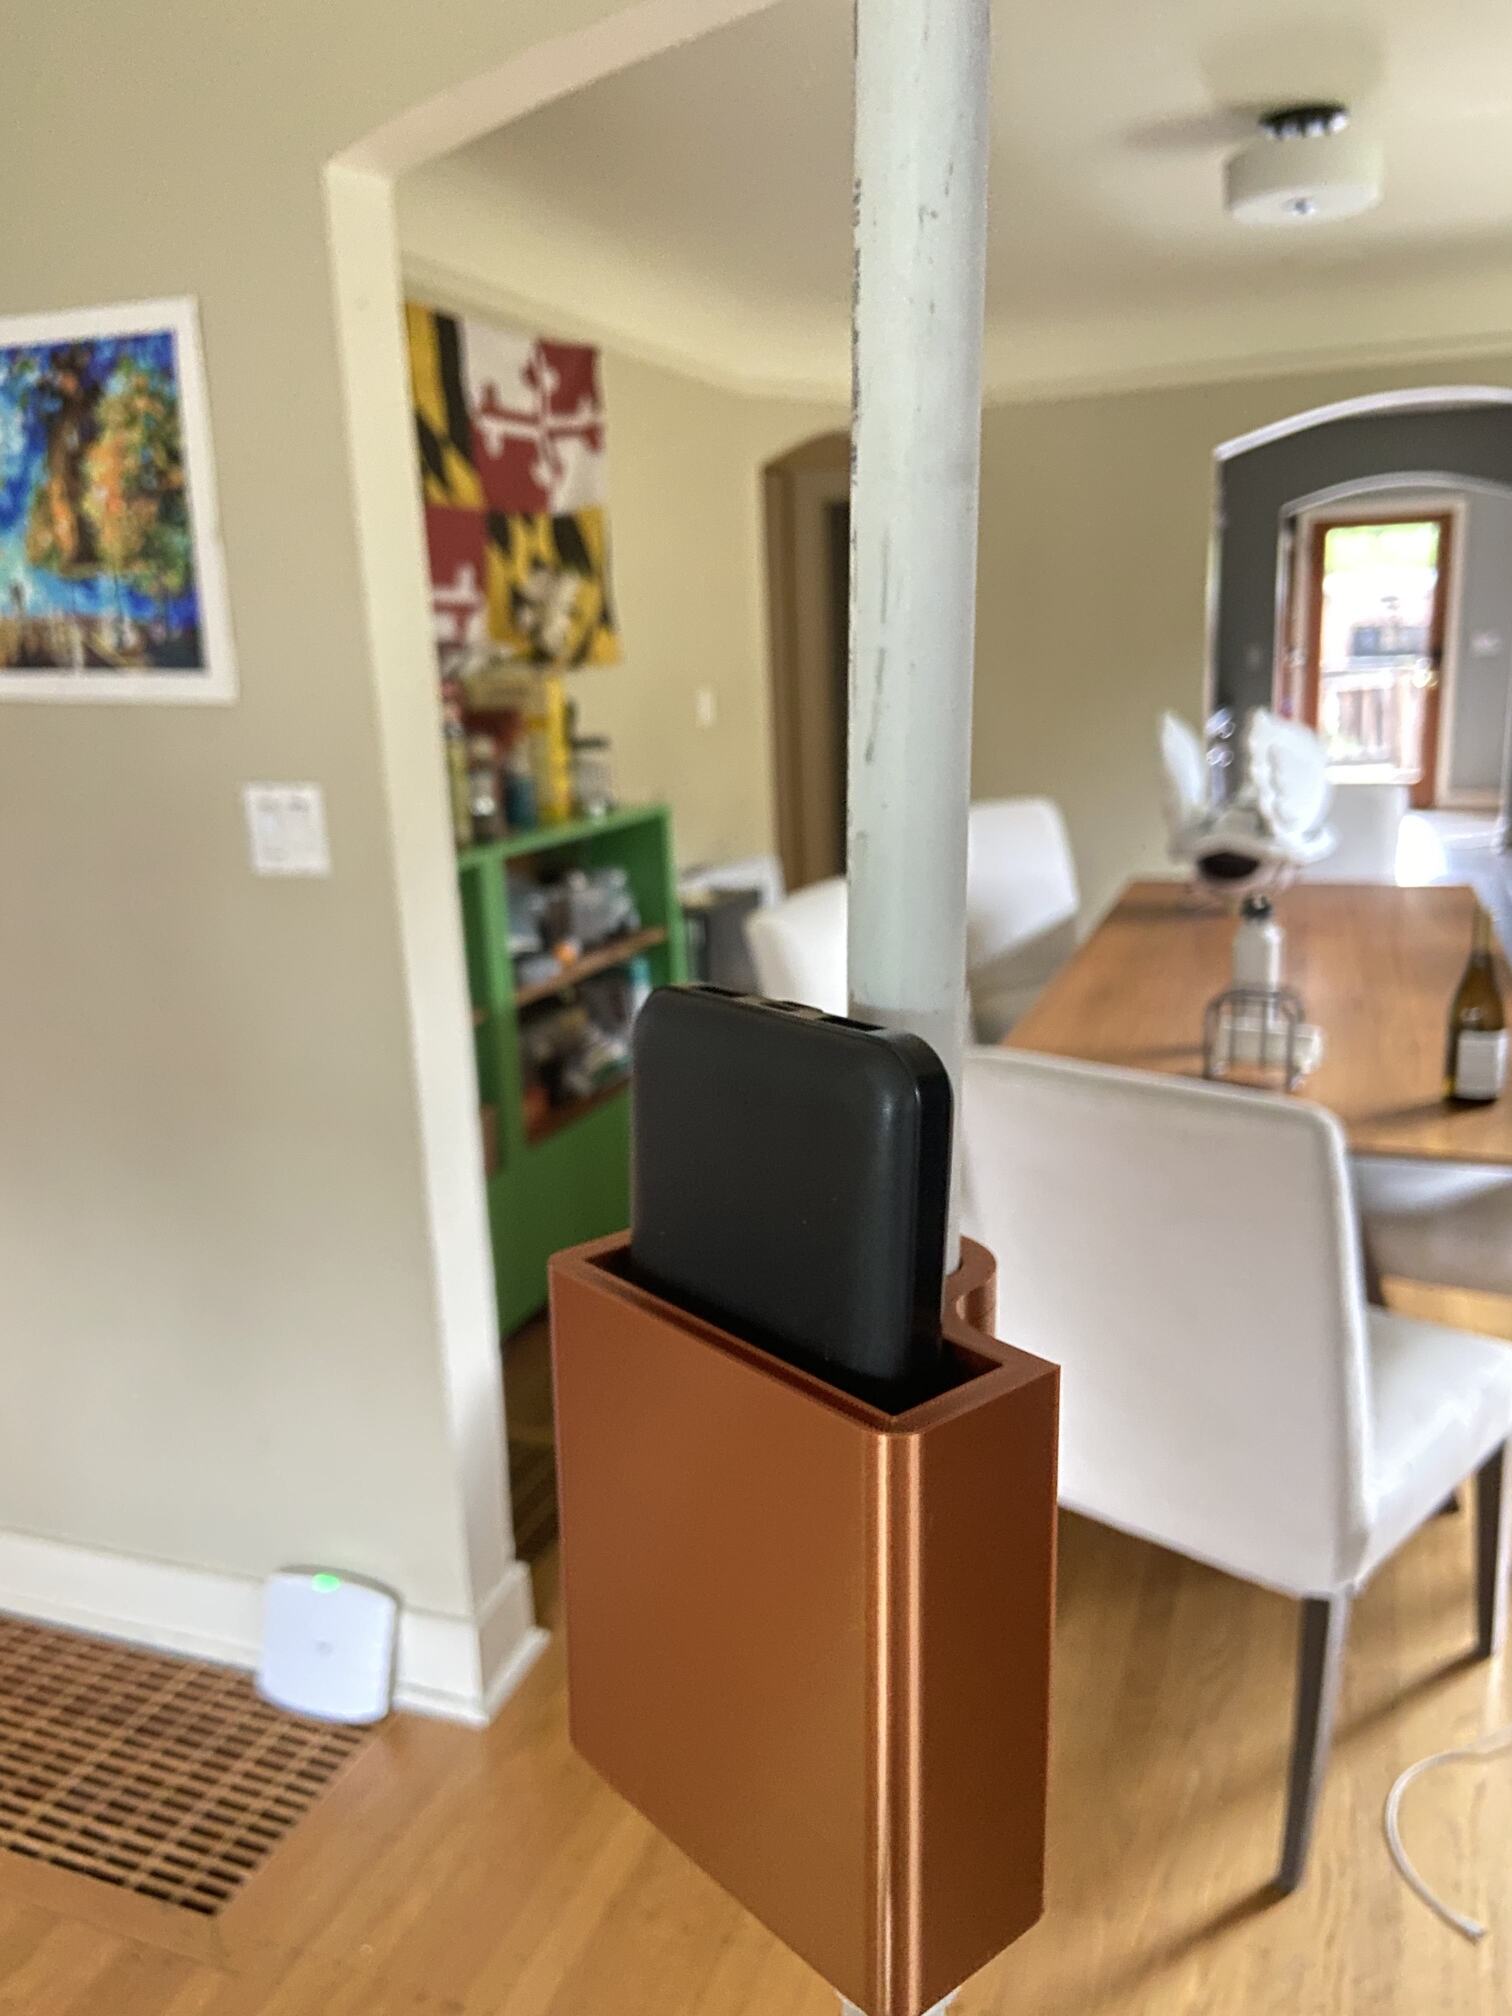
I designed and 3D printed a little holder for our power supply right above a T junction in the pole. (so the USB extender could come out)
Then (not pictured) I took the PVC pipe outside and spraypainted it Mario pipe green!
Beyond Wonderland PNW!
The totem did such a good job keeping us together! I will admit, I did not trust my last-minute creation. I brought extra glue, tape, screwdrivers, scissors and anything else the totem may need if it breaks. But luckily I didn’t need it!
Especially when we turned it on at night so many people loved it! We even had a couple friendly strangers come and ask to take a photo with it!

Conclusions and Improvements
Here's some things I learned:
- Some plastics are not easy to drill into. Sandwiching the plastic between two pieces of wood and drilling very, very slowly got me through the bowl!
- 0.5” PVC is not great at supporting 2lbs at 10ft tall. Further, PVC pipe joints are bendy, so the totem would sway a bit here and there.
- Counterbalancing this was difficult. Since the center of balance was around head height, the bearer of the totem felt burdened keeping it upright as it was hard to walk around with it casually. Our last-minute fix to this was to strap a water bottle on the base of it, adding even more weight!
- When you have a totem, nobody gets lost!
- Further, random strangers you meet at festivals can find you because of your totem!
Improvements:
I’m writing this post now after using the totem again at Beyond Wonderland 2022!
Before this year, I took the learnings and to improve it I:
- Switched the pole from plastic to aluminum!
- I chose a pole made of 12-inch segments that can be attached up to 10 feet. This way if we were walking with it, we could lower it down to the height of a walking stick. But in a crowd, it could be much above our heads.
- I extended the USB power cable to the base of the pole and strapped the power bank near the base. This helped dramatically with the center of balance issue and improved keeping it upright significantly.
- The top and bottom bowls were not directly connected (only the pipe kept it together). This meant the rims of the bowls were often up to 0.5-1” misaligned. I subtly put very small hooks on the top and bottom near the rims and added zip ties between them. Zip ties can be easily cut allowing access inside. This added a lot of security to the entire shell.
Todo for the next festival:
- PVC glue the inside parts! We almost beheaded our totem this year because the inside came apart! Luckily a bit of force pushed it back together and we raved the night out.
- Build a carrying case so I can fly with it! This has to get to EDC one day!
FYI: 2022 version with the metal pole is the highlight image of this post under the menu on the left!